Processing a Split Rx
The Split Rx functionality is only available in a limited number of New Brunswick stores on PharmaClik Rx 2.7.
In some situations, a prescriber may send a PrescribeIT® prescription that contains an item that must be split into multiple drugs in order to be dispensed. This is referred to as a Split Rx.
A medication strength is not commercially available, so multiple drug strengths must be combined to fulfill the prescription. A combination pack is on backorder or not insured by the patient's plan, so the individual drugs in the combination pack must be dispensed separately.
Processing a New Rx Request for a Split Rx
To process a New Rx Request for a Split Rx:
-
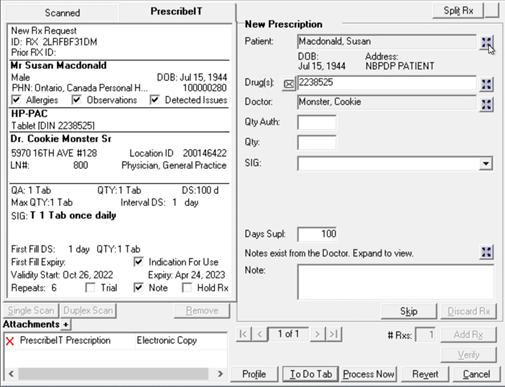
Select the prescription from the PrescribeIT® To Do tab. The New Prescription window opens.
-
Synchronize the patient and prescriber if they have not been previously synchronized. For more information, see:
-
If the prescription is part of a bundle, navigate to the prescription requiring a split using the arrow buttons.
-
Select Split Rx. A Confirmation window appears.
The Split Rx button is only enabled for PrescribeIT® prescriptions where the patient and prescriber have been synchronized.
-
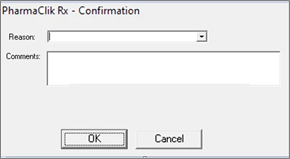
Enter or select the following in the Confirmation window:
-
Reason - select the reason for splitting the prescription.
-
Comments - enter any required comments. This is optional unless a Reason of Other is chosen.
The Reason and Comments will be applied to all prescriptions created from the split.

-
-
Select OK. A counter will appear beside the Split Rx button to indicate which prescriptions are part of a split and the total number of prescriptions in the split.
-
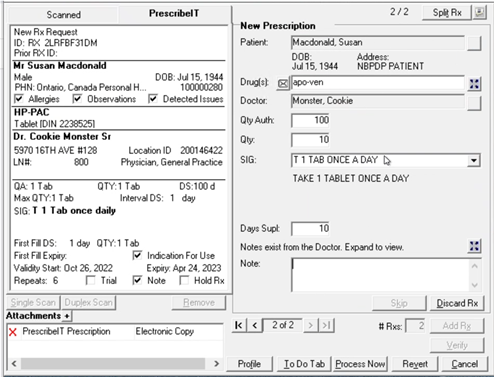
Enter the following for the Split Rx:
-
Drug
-
Qty Auth
-
Qty
-
SIG
-
Days Supl
If the medication is already on the patient's Profile, you can select the Profile button, highlight the prescription from the Profile, and select ReAuth to automatically link the prescription to the previous fill. Ensure to validate the information entered in the window before proceeding.
-
-
If additional prescriptions need to be added to the split, select Split Rx again and repeat step 7 for each prescription in the split. A prescription can be split into a maximum of 5 prescriptions.
-
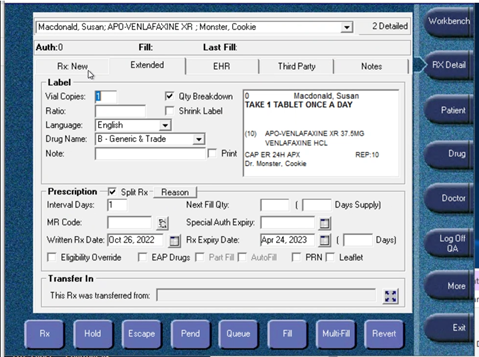
Once you have confirmed the fields for each prescription in the New Prescription window, select Process Now. The first prescription in the Split Rx opens in Rx Detail. A Split Rx indicator displays in the Prescription section.
You can hover over the Split Rx indicator to view the reason for the split.

-
If you need to update the Reason and Comments for the Split Rx or remove the prescription from the split, select the Extended tab.
-
Select the Reason button to update the reason and comments for the Split Rx. Changing this information for one prescription will update it for all prescriptions in the split.
-
Deselect the Split Rx checkbox if you want to remove the prescription from the Split Rx. Once the prescription has adjudicated, the Split Rx checkbox cannot be edited.
When there are only 2 prescriptions in a split, the split indicator and reason can be removed from both prescriptions if you deselect the Split Rx checkbox or escape from the first prescription. When either scenario occurs, a prompt will appear indicating the prescription has been returned to the PrescribeIT® Manager. The prescription must be processed from PrescribeIT To Do tab. If the remaining prescriptions in Rx Detail are processed, it will be handled outside of PrescribeIT®, as local prescriptions. If you fill the first prescription with the Split Rx checkbox on but escape or deselect the checkbox from the second prescription, the first prescription will still have the Split Rx indicator. You must rebill the first prescription and deselect the checkbox or refuse the prescription back to the PrescribeIT® manager.
-
-
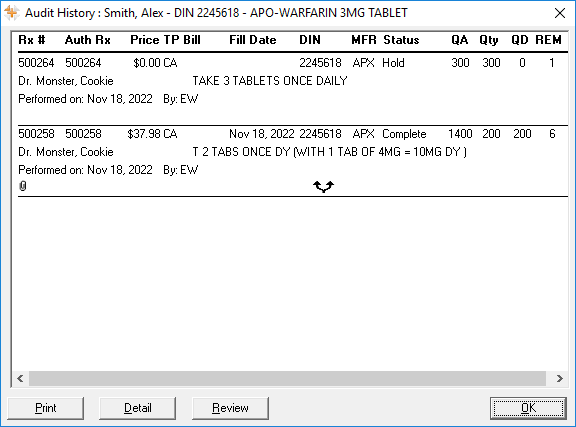
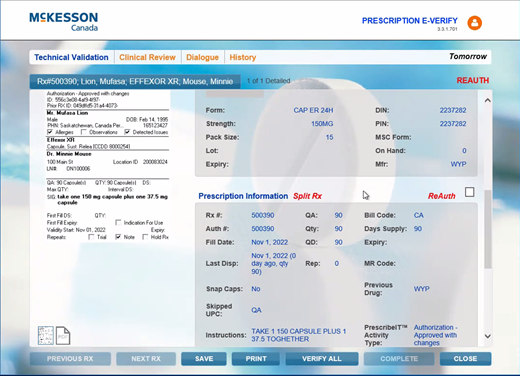
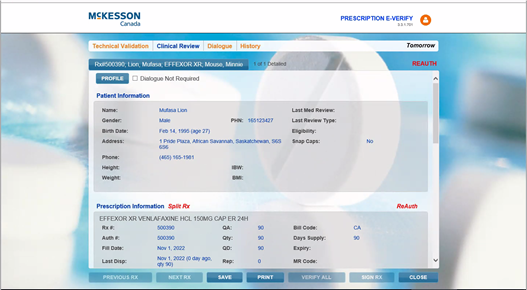
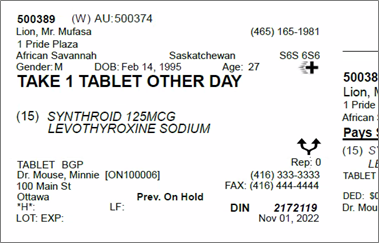
Once all information in Rx Detail has been validated, select Fill to process the prescription. As the prescription moves through Workflow, as per your Pharmacy Preferences, a Split Rx indicator will appear for the prescriptions that are part of the split. An indicator will also appear on the hard copy or e-File copy, Profile, and prescription Audit History.


Refilling a Split Rx
The process for refilling a prescription that is part of a split is the same as a regular PrescribeIT® prescription.
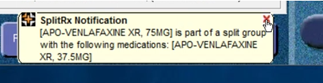
When Rx Detail is opened, a notification bubble appears to inform you there are other prescriptions included in the split. This serves as a reminder to refill the related prescriptions as well.
Processing a Renewal Rx Request for a Split Rx
When processing a Renewal Rx Request for a Split Rx, you will be prompted that the Renewal Request is associated with a Split Rx. You then have the option to split the PrescribeIT® prescription again if needed.
To process a Renewal Request for a Split Rx:
- Highlight the Renewal Rx Request transaction in the PrescribeIT® To Do tab.
-
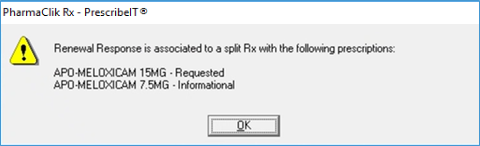
Select Process. If the Renewal Response is related to an Authorization Request sent for a Split Rx, a prompt appears informing you that the prescription is associated with a split. Select OK.
The New Prescription Window opens.
-
There are two tabs: Scanned and PrescribeIT®.
- The PrescribeIT® tab is the default and displays a summary of the prescription sent from the prescriber. For more information, see PrescribeIT® New Prescription Window Overview.
- The Scanned tab displays any related documents attached to a PrescribeIT® prescription.
-
-
Use one of the following options:
-
To process the prescription as is, enter the prescription information in the Intake window.
-
To split the prescription:
-
select Split Rx. The Split Reason window opens.
-
Select the Reason. Enter any Comments if required.
-
Select OK.
-
Select Profile.
-
Highlight the prescription for the same medication from the Profile.
-
Select ReAuth to automatically link the prescription to the previous fill.
-
Confirm the information in the Intake window and update any fields as needed.
-
Repeat steps 1 - 7 until all necessary prescriptions are created for the split.
-
-
-
Select Process Now. Continue processing the prescription(s) as per usual process.
Manually Reauthorizing a Split Rx
When manually reauthorizing a prescription that is part of a split with other prescriptions, the new authorization will not be associated with the split group. However, the previous authorization will remain associated with the split group and appear on Authorization Request forms for the split group.
To manually reauthorize a Split Rx prescription:
-
Open the Patient Folder.
-
Select the Profile tab.
-
Select the prescription.
-
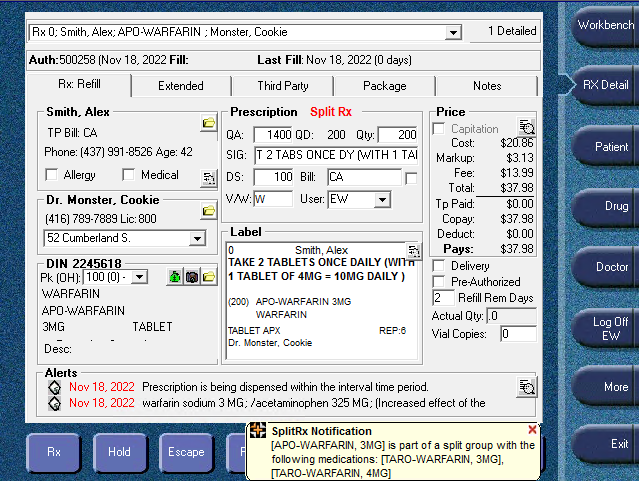
Select Refill. Rx Detail opens and a SplitRx Notification bubble appears to inform you that the medication is part of a split group with other medications.
-
Once all information in Rx Detail has been validated, select Fill to process the prescription. A Split Rx indicator will not appear for the new authorization on the Profile, Audit History, or Hard Copy/e-File Copy.